Installing the basic version #
- Access the WordPress Dashboard: Log in to the admin area of your WordPress site.
- Navigate to Plugins: In the left/right sidebar menu, hover over “Plugins” and then click “Add New”.
- Search for a plugin: In the search bar at the top right, type “Advanced Notifications” Wait or press Enter.
- Installing the plugin: Once the plugin appears in the search results, locate it and click the “Install Now” button next to it.
- Activate plugin: After installation, click the “Activate” button to activate the plugin
Installing the PRO version #
Step 1: go to “My Account” to download the Advanced Notifications PRO installation file
Step 2: go to the WordPress site where you want to install the Advanced Notifications PRO plugin
Go to: Plugins > Add new plugin
Click on the Upload plugin button at the top
Select the installation file that we downloaded earlier to the computer and click Install now
If the basic plugin is installed or a previous version of Advanced Notifications PRO, you must confirm the plugin replacement when asked. Don’t worry, the non-previous information will not be deleted
After installation, go to Plugins and make sure the plugin is activated
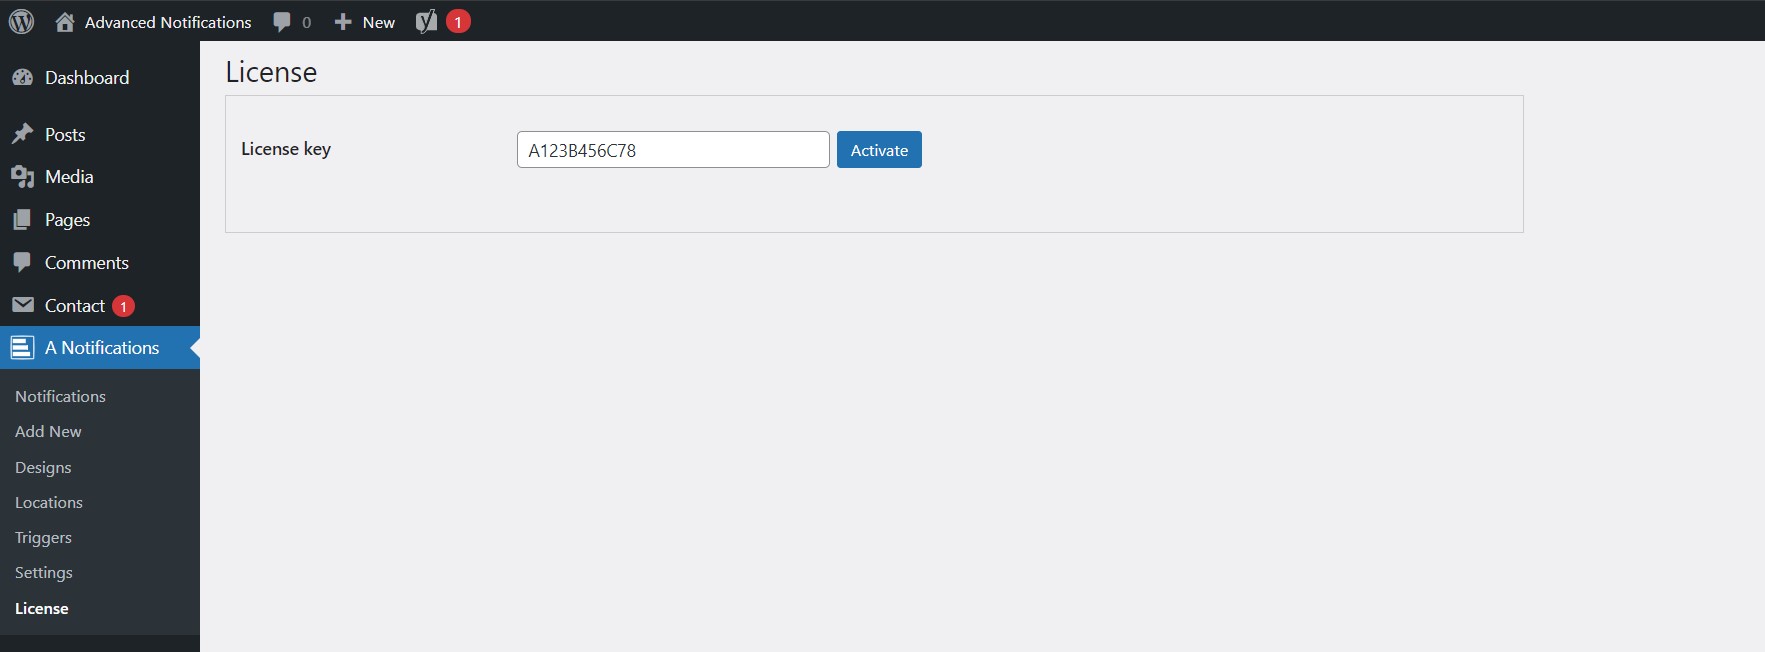
Step 3: Activation of the license key
Copy the license key that appears in “My Account” under Licenses
Go to: A Notifications > License on your WordPress website
and paste the license key
Then click Activate
If there is a problem, a message will appear that will allow you to understand what to do if you are not getting along, you can always contact our support and we will help you


