To create a new notification, follow these steps:
1. Navigate to Create a Notification #
- Go to the sidebar menu and hover over “Notifications”.
- Click on “Add New”.
2. Provide a Descriptive Title #
- Give your notification a title that clearly describes its purpose.
3. Set Notification Details #
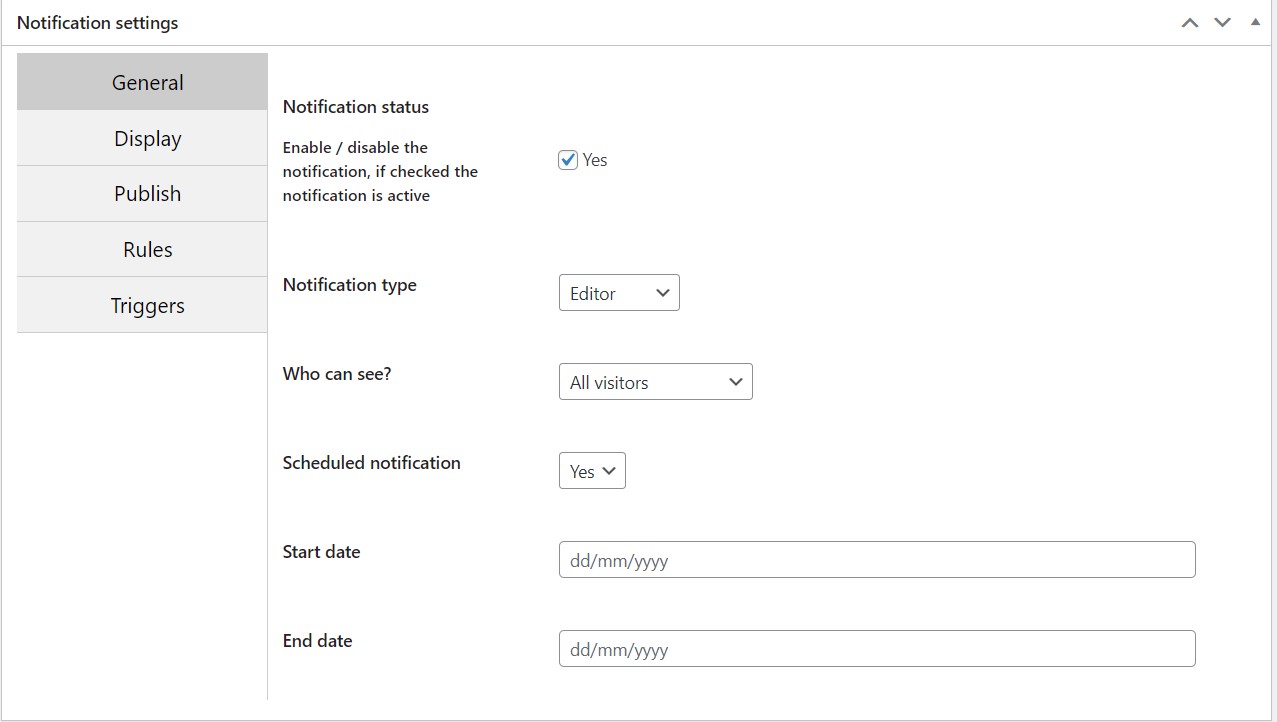
General Tab: #

- Notification status – turning the notification on or off.
- Notification type – select the type of notification, for example: if “editor” is selected then we will enter content in the editor box below the title.Each type of notification brings with it options suitable for it.
- Who can see? – Allows us to choose which of the website users will be shown the alert. In the PRO version, you can choose whether the notification will be shown to certain role holders or to logged-in users only or to non-logged-in users, etc.
- Scheduled notification – allows you to set a start date and an end date when the notification will be displayed.
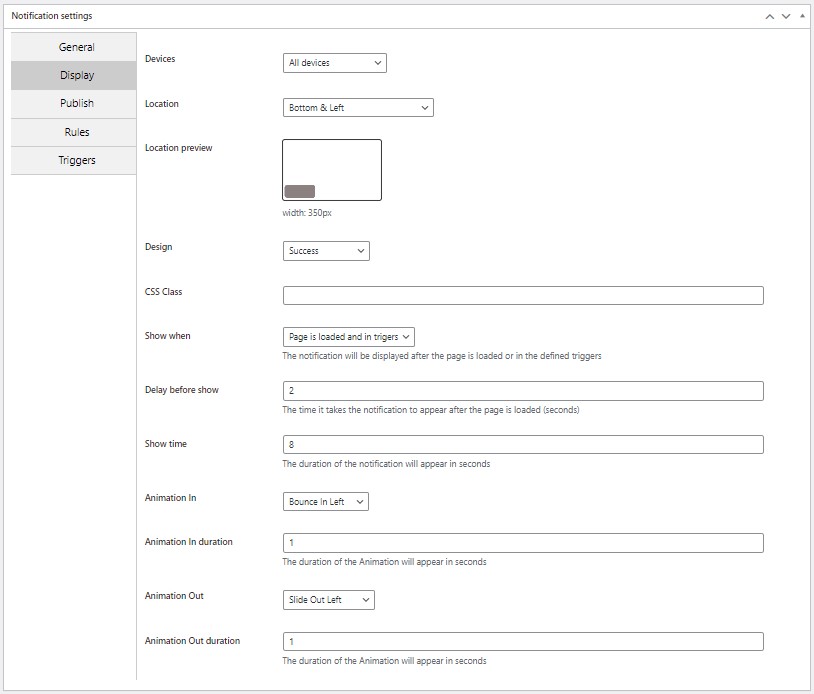
Display Tab: #

- Devices – defines the types of screens on which the notification will appear
- Location – defines the location of the notification on the screen
- Design – defines the design of the Design. You can create a custom design in A Notifications -> Designs, after creating it it will appear in this list
- CSS Class – allows you to add a Class for CSS design needs and JS operations
- Show when – important! We can choose for the notification to appear when the page loads or when a trigger is activated. In the PRO version, there is an option for the notification to be displayed only through triggers for uses such as a contact form or adding to the shopping cart, etc.
- Delay before show – defines the number of seconds that the comment will be delayed before it appears from the moment the page is finished loading in the browser. In order for the notification to appear immediately, set 0.
- Show time – the number of seconds that Notification will appear and then close. If we want the notification to appear indefinitely, set 0.
- Animation In – defines the entry animation that will display the Notification.
- Animation In duration – defines the number of seconds the entry animation will take place. This time is added to the notification display time in the Show time setting.
- Animation Out – defines the exit animation before closing the Notification.
- Animation Out duration – defines the number of seconds the exit animation will take place. This time is added to the notification display time in the Show time setting
Publish Tab: #

- Publish Type: Choose where the notification will be displayed.
- All: Display on all website pages.
- Custom: Specify post types and taxonomies.
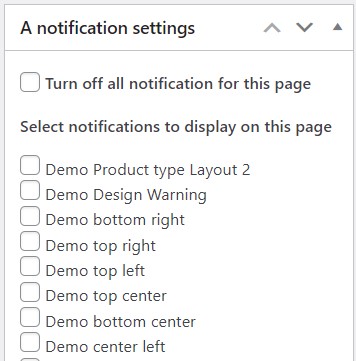
- Specific Pages: Displays the notification only on selected pages and on pages marked to display the specific notification from the meta box found in the editing of the specific page or post

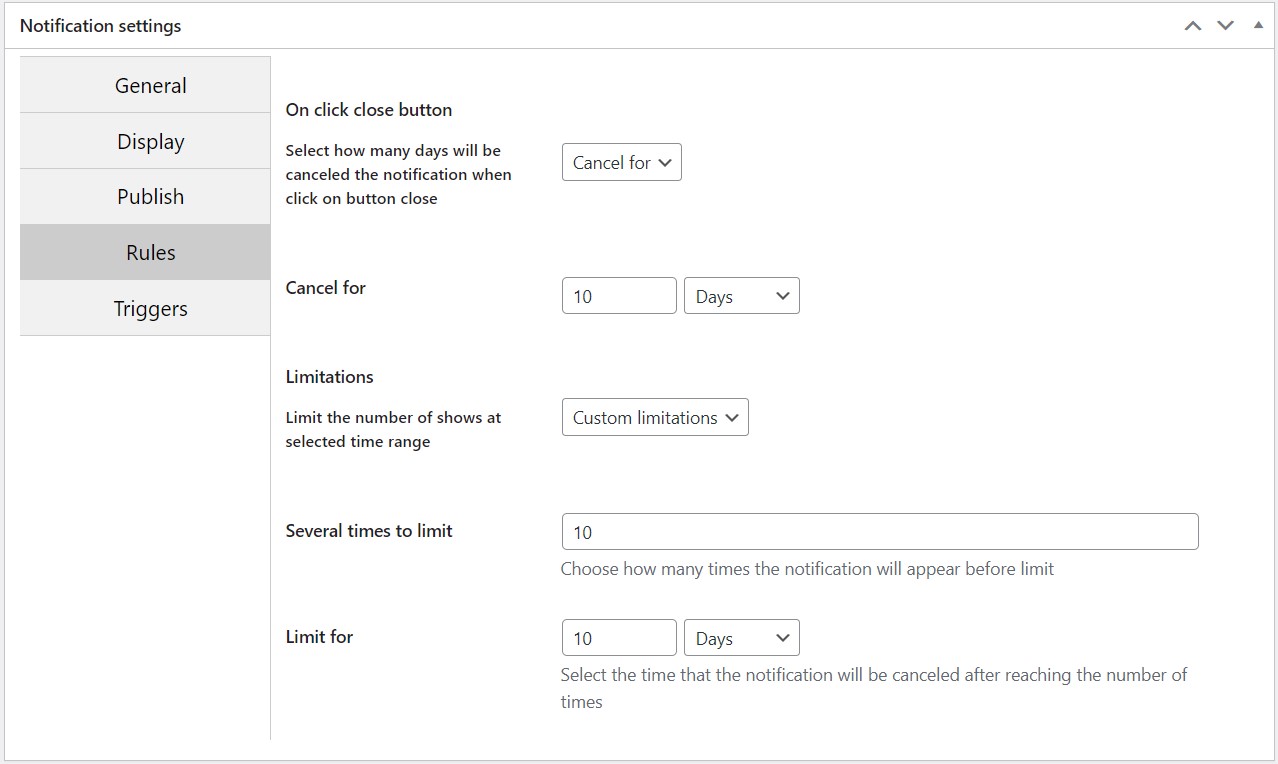
Tab Rules: #

- On click close button – when clicking the close button of the ad, the notification can be hidden from the user for the specified time (cookies are used)
- Limitations – it is possible to hide the notification from the surfer if after a specified number of times it appeared for a specified time (cookies are used). For example, it is possible to stop the appearance of the notification to the surfer for 3 days after it has appeared twice
Triggers Tab: #

Triggers: You can define the triggers in which the notification will appear or close. For example, we can set the notification to appear after sending a contact form or adding to the shopping cart.
4. Save and Publish #
Once you’ve configured the notification settings, save your changes and publish the notification.


